4/24/2014

Special Offer–EBook Resource Library

Working from home as a digital designer while managing so many other aspects of modern life including motherhood and everything about home management can be a lot! Believe me, I KNOW!! That’s why I was just jumping with excitement when I saw this offer yesterday.

If you have been scrambling for resources to help you manage your life and home, your search may be over today. Give Pinterest a break for a while (it will still be there when you get back), let your RSS collect your blogs and take some time to get fresh ideas and vision for your life with the Ultimate Homemaking Bundle.

Get The Ultimate Homemaking Bundle--Hurry: Sale 6 Days Only!

The Ultimate Homemaking Bundle is a complete library of great eBooks on homemaking—a truly valuable knowledge base you’ll use for many years to come.

Unlike a library, though, you don’t have to spend years building it up. The Ultimate Bundles team has done the hard work for you, searching the web to find the very best eBooks from top homemaking authors and combining them into one essential collection that you can buy in one simple purchase.

This is SUCH a timesaver!  If you’re working from home, especially with kids, then you know you have precious little “extra” time to seek out ideas for making life work better. I’ve spent 8½ years working online and collecting resources while managing a large household. I’ve read countless blogs and books but I have honestly never seen such a comprehensive set of homemaking resources anywhere -- and certainly not at this price. Bought separately, they’d cost a total of $698 (not including $200+ in bonuses!).

This bundle has an incredible price at just $29.97!

Or, for just an extra $10, you can also get the full set of PDF files, PLUS a bonus set of Kindle editions, perfectly formatted for easy Kindle reading.

This offer is ONLY available for six days. Read on for all the details and then grab your copy before it's gone!

You get ALL THIS in The Ultimate Homemaking Bundle!

In this bundle, you will find 80+ eResources aimed to grow you in all aspects of homemaking, including:

  • Homemaking
  • Motherhood
  • Marriage
  • Food (recipes!)
  • Self-care
  • Faith (for you & for your kids)
  • Work-from-home & blogging
  • Pregnancy & babies
  • Health & wellness
  • Homeschooling
  • Holidays & special events
  • Financial stewardship

See the full list of 80+ eBooks, audio files, eCourses & printable packs included in the sale. I know this offer is not for everyone as we are all in different stages of life and womanhood but there is a lot here that is of interest to a wide variety of readers! For example, I am well past pregnancy and babies but many of the other areas are of interest to me.

There are also $200 of freebies from 10 awesome partners -

bonus-images As well as five more incredible offers from:

These deals are worth over six times the price of the Ultimate Homemaking Bundle. So you’re up on the deal right away!

Learn more about the bonus offers.

Buy the PDF BundleBuy the Kindle Bundle

This huge wealth of information and guidance will be right there on your laptop, tablet, smartphone, or Kindle, whenever you need it.

Here's what you need to know about the sale:

When? 8 a.m. EST Wednesday, April 23 until 11:59 p.m. EST Monday, April 28

What? 78 eBooks, 2 eCourses, 2 audio files, and 2 printable packs PLUS over $200 worth of bonus products you'll really use!

Where? Purchase the bundle here.

How much? Well now, that's the best part. The entire package is worth nearly $900, and it's selling for less than $30. Sweet deal, right?

Get ALL of these eBooks for 1 LOW Price! One Week Only!

Want to learn more? Read about what this amazing bundle offers —or just buy it now!

Buy the PDF BundleBuy the Kindle Bundle

Remember, this bundle is available for 6 days only, from 8 a.m. (EST) on Wednesday, April 23 to 11:59 p.m. (EST) on Monday, April 28th.

Disclosure: I have included affiliate links in this post. Read the fine print about this bundle and read the answers to frequently asked questions about the bundle.

4/17/2014

Quick and Easy Torn Paper Pieces

tip-torn
Today you can learn how to make torn paper pieces for your digital scrapbook kits as you get a close-up look at a unique product set available at CUDigitals.
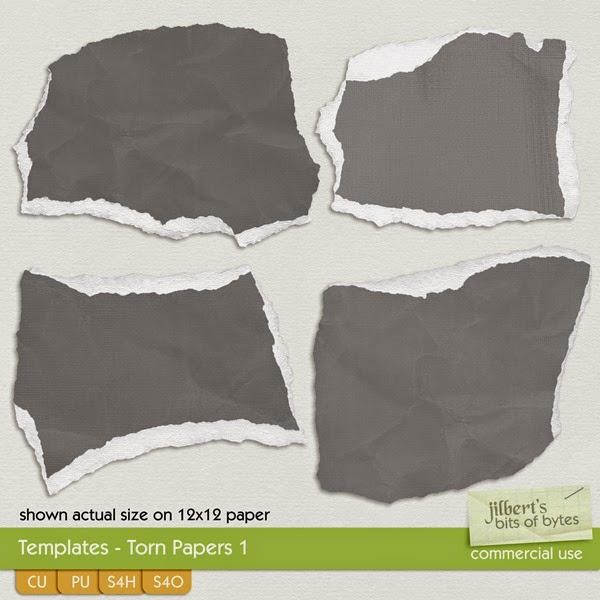
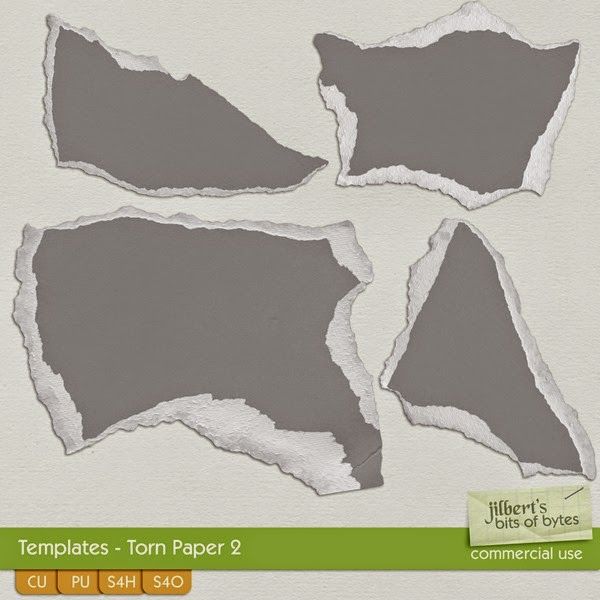
The templates for this tutorials are Torn Paper Templates 1 and 2 by Jilbert’s Bit of Bytes. They are a GREAT value because they can be used over and over to create different paper bits that can be included as individual pieces in your kits or layers with other items to create collage pieces, borders, clusters, etc. After you see how easy they are to use, I think you’ll see why they would be a super addition to your CU stash.
Here are the template previews
Torn Templates 1
Torn Paper Templates 2
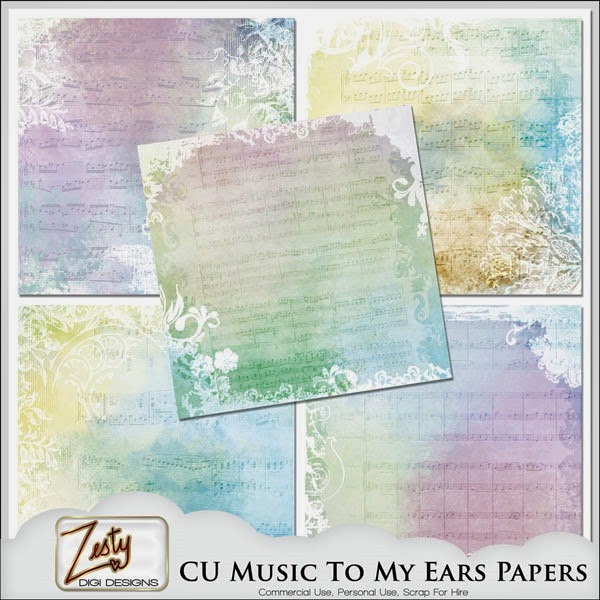
Here is a SUPER quick way to use them! For this example, I am using some ready made CU OK papers by Zesty Digi Designs.
eb_CU_MusicToMyEars_preview
To begin, open the Torn Paper template of your choice. With the product download, you get your choice of .psd or .tif or .png format. For this tutorial, I opened the .psd version and added a white layer so I could see a little better as I was working. Before saving the final version, this layer can be deleted or turned off.
template
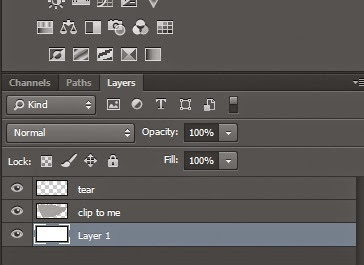
The template includes the paper part and the torn part on separate layers. This is GREAT for being able to recolor separately!
layers
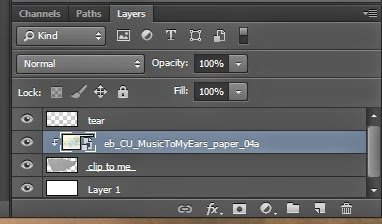
To customize, I dragged one of the Zesty Digi Designs papers onto the layer above the grey template layer called “clip to me” – aptly named because the next step is to clip the paper to the template layer.
Options in Photoshop to do this:
CTRL + ALT + G || or layer > create clipping mask in the menus || or ALT + CLICK on the line between the 2 layers in the layers palette
layers_paper
Here’s the result:
with_paper
Voila, we already have something really cool!
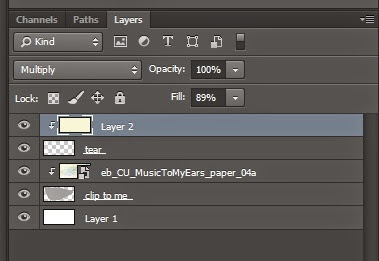
But, we also can give the edge layer a little bit of color to coordinate with the paper. To do this, I added a solid fill layer above the edge. I chose the creamy color from the paper using the eyedropper tool. Then I changed the blend mode to “multiply” AND reduced the fill of the fill layer a bit so it wasn’t so dark.
layers_edge
This is the final result
with_egde
Here’s a close up on how fabulous the texture is on the torn areas:
texture

And an example of a cluster that could be made with a torn piece and some other fabulous supplies available at CUDigitals. I hope you are inspired!

cluster_pre
Products used:
eb_CU_Butterflies_Set2_previewCU Handpainted ChinaPack Comercial Use 01/2011 (CU) by Pati AraujoPrecious Gemstones, Vol. 4Wire Border Pieces 1Strings Set 3
ibdd_shadowme_vol1_preview

And if you are looking for MORE torn paper options, check out these items, also available at CUDigitals
CU Layered Paper Templates - Torn PapersCU Ripped Paper Layered Template 2Paper Tears by Boop DesignsTorn Edges TEMPLATES by Boop Designs

Did you find this useful? Subscribe to the CUDigitals weekly newsletter and never miss another tip, event or freebie! And be sure to follow us on Facebook for a CU freebie overlay set and extra links to helpful articles for your digital scrapbook design business.


4/10/2014

Fast and Easy Digital Altered Frame Tutorial


digital altered frame tutorial for digital scrapbook designers

Today you can learn a quick and easy method to make altered photo frames in Photoshop using purchased CU frames and a “paper sandwich”.  Adding a coordinated frame into your kits is a great way to really make your designs unique and marketable!

Start by opening a finished paper for your kit (flattened/.jpg) and then drag the frame you want to use onto your canvas one layer above the paper.

frame1

In this example, I am using the paper I made for the easy distressed paper tutorial HERE. The frame is from Frame Me 4 by Manu Scraps

ManuFrames4

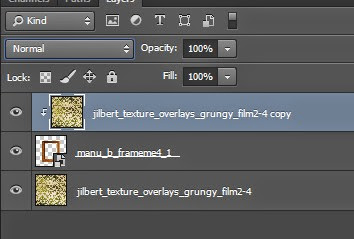
Next, make the paper sandwich – just add another copy of the paper on the layer above the frame and then clip it to the frame layer.

You can do this in the menus with layer > create clipping mask
or keyboard combo CTRL + ALT + G
OR ALT + click on the line between the layers in the layer palette
layers

(In your work area you will not be able to see the frame anymore but we will adjust that in the next step.)


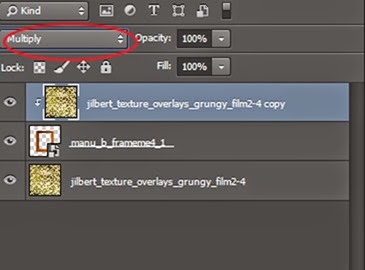
Now for the magic and fun. The first step is to change the blend mode of the top paper layer. I started with multiply

blend-mode

This can be set in the layers palette just above the layer thumbnails
mult

Now it’s time to do some Photoshop magic. The reason for the paper sandwich is so that as you are making adjustments on the frame or top paper, you can see how to colors and saturation match the original paper. This way, you don’t get a frame that is altered with the patterned paper and matching your theme but off on colors.

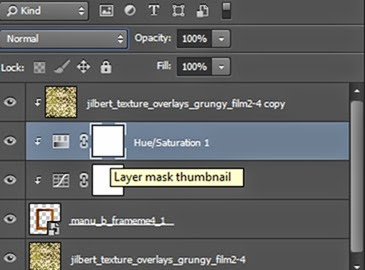
To get a good match, you have a ton of options and I find it is just a matter of playing with different options – primarily the blend mode of the paper plus adjustments to the frame. I usually start with curves, saturation and exposure on the frame. I always work with adjustment layers rather than making a change to the layer itself. That way, the change is non-destructive – it can be adjusted more.

IMPORTANT: Make sure you clip the adjustment layers to the frame or it will also affect the bottom paper layer too and you will not be able to see the original paper colors and lightness
adjustments

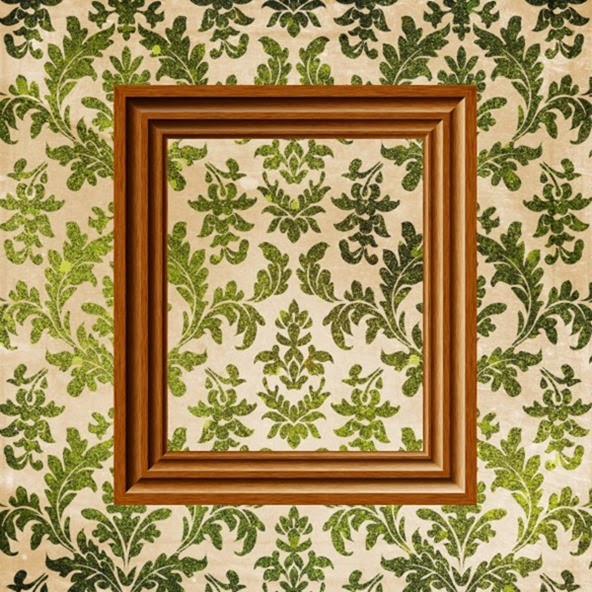
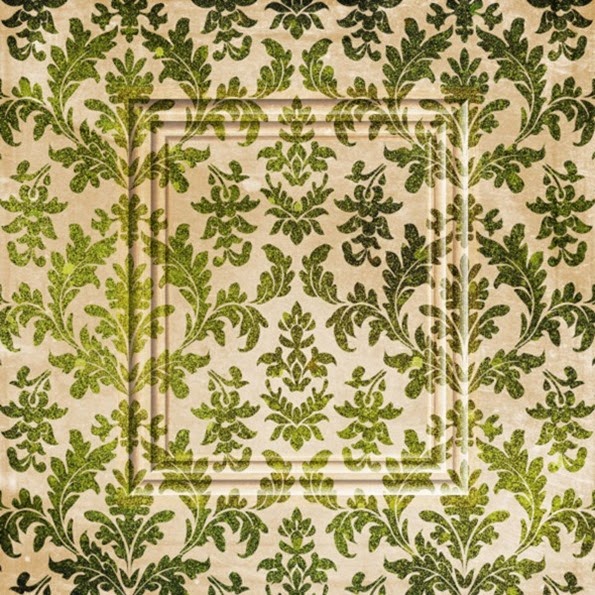
This is my final result on the above frame and paper.

I used Overlay blend mode on the paper. I added a curves adjustment (pulling the curve UP in the right corner) and a hue/saturation adjustment (-80 saturation, +21 lightness). You can see that I have a good match on the frame with the original paper in terms of color and lightness.
finished

To finish, simply turn off the visibility of the bottom layer. Don’t forget to trim empty pixels before saving as the final .png for your kit.

final

I hope you have fun playing with technique and discover lots of ways to use it for your digital scrapbook kit designs.

Be sure to check out the store at CUDigitals for a large selection of CU OK frames you could use as well as thousands of other Commercial Use digiscrap tools and supplies.

CU Frame Me Bundle {Vol. 4 - 7}White Frames - Collection ThreeFrames - Vintage 2
Frames - Vintage 1Frames - Old Photos 1White Washed Frames
Flourished FramesWhite Frames - Collection OneFrames - Wood 1


Did you find this useful? Subscribe to the CUDigitals weekly newsletter and never miss another tip, event or freebie! And be sure to follow us on Facebook for a CU freebie overlay set and extra links to helpful articles for your digital scrapbook design business.

4/09/2014

Heartbleed and Security at CUDigitals

heartbleedIf you are concerned about the security of shopping at CUDigitals in light of the recent news about the Heartbleed bug, please be aware that our web host, Site5.com has issued a statement that most of their servers were not running the vulnerable software and those that were have already been updated. It is safe to login and shop with us!

You can read more on our host blog HERE as well as get a link to a site where you can enter a URL to see if a certain site is OK/unaffected. (Paypal is OK by the way!)

If you are running a zencart store to sell your digital scrapbook designs, there is also info in the ZC forums here.