3/27/2014

21 Things to Share on Social Media

It’s a great habit to regularly share good content on social media. It’s important to be active with MORE than just your newest releases. Some experts say you should have 3 info posts for every sales post! Why not try to integrate more info into your social media this week?
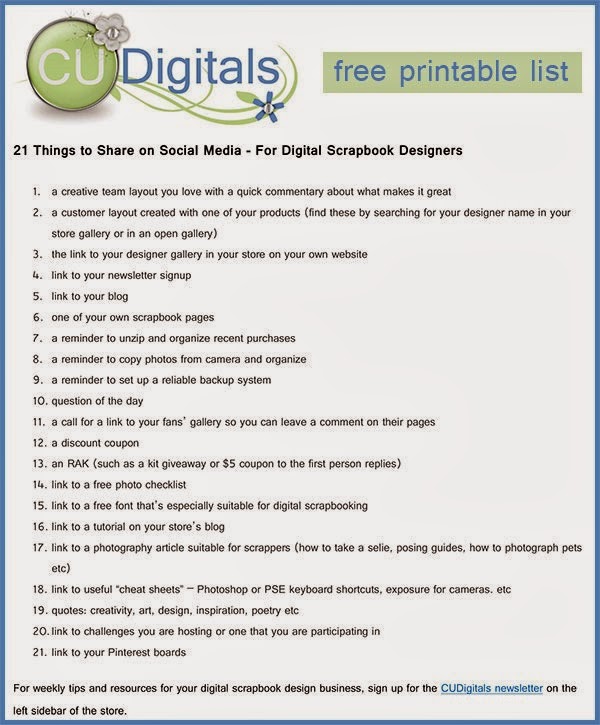
Here is a list of 21 quick ideas that you can post, pin and share on Facebook, Twitter, G+ and Pinterest
Click on the graphic to get a FREE printable pdf version you can save.
Microsoft Word - 21 Things to Share on Social Media
This is only a starter list! All these items could be repeated at a certain interval and expanded on. For example, you could easily share many Creative Team pages, free fonts and photography ideas every week!

Did you find this useful? Subscribe to the CUDigitals weekly newsletter and never miss another tip, event or freebie! And be sure to follow us on Facebook for a CU freebie overlay set and daily links to helpful articles for your digital scrapbook design business.


3/20/2014

Navigating the New Facebook Format

tip-newFB

Facebook is rolling out a new format for fan pages. This time around, I am pretty excited to see the changes. For digital scrapbook designers, one of the greatest changes is in an increase in the graphics sizes because there are no longer 2 columns in the newsfeed but one. You can see the new format on the CUDigitals Facebook page HERE.

You can see a great graphic of some of the highlights in this change over at AllFacebook.

I also noticed a few items important for digital designers and a really great feature that I know is going to save me some time and trouble!

First, for digital designers, I really like how the “short description” of your page in now right above the website URL so you don’t have to work that in anymore.

Check out the prominent display of the page description and working web link right below it in the new design
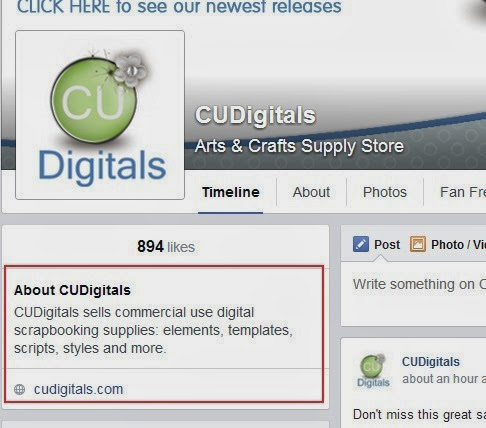
short-new

To make the best use of this change, after you convert, hover your mouse in the upper right corner of the about box and you will get a link to edit.
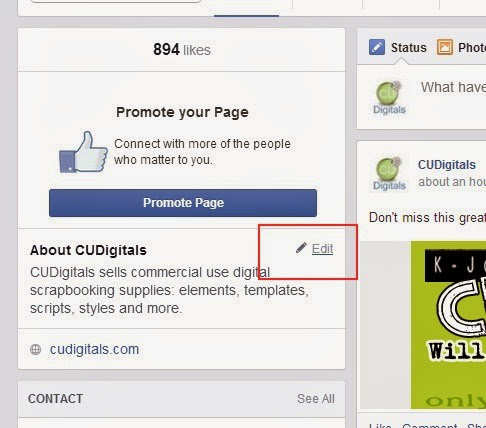
edit

Then scroll down to fill in your SHORT DESCRIPTION and down to the bottom to fill in your WEBSITE.

Designers, I do not recommend adding your store URL under website unless it is your personal store or unless you don’t have a blog. Bring your fans to your blog so they have additional opportunities to connect with you such as signing up for your newsletter.  If you do add your store here, make sure it is shortened, especially if it is a zencart address that is long.

You can use bit.ly to create a custom short URL such as bit.ly/ChristinesStore. After you enter the link, click the little pencil to edit
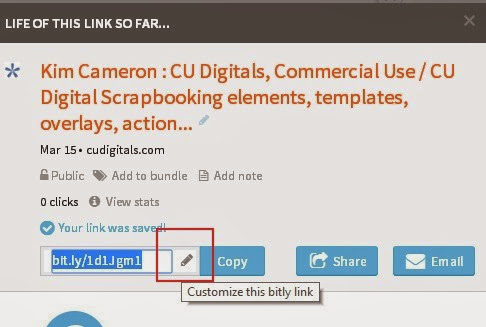
bitly-1

Then create the custom link such as bit.ly/KimsStore. Put that link under website on your Facebook page.

The next thing I like about the new page format is you can now see who you are using your page as. I know I’m not the only one who forgets to switch over to my Page role sometimes. When you do that, you post as a person, not the page. This means your post doesn’t go into the timeline, it goes into the sidebar and gets hidden.

But now, you get your profile picture right in the box so you can see your page role! They also have different words. YAY!

Posting as self on the page

login-ChristineSmith


Posting as page admin

login-CUD

I know there will be more things to share about this transition. In the coming weeks, I will be linking up resources and articles on the CUDigitals Facebook page and compiling any big news here. If you have feedback to share, leave a comment for us!
3/13/2014

The Hidden Transform Menu in Photoshop

CUDigitals Designer Tip - The Hidden Transform Menu
I love shortcuts! For some reason, they feel much faster to me than digging into the extensive menu system in Photoshop. I have a few go-to shortcuts for working with transforming things while working in Photoshop that you may find useful.
What is transforming?
It is any time you resize, rotate or warp something in a Photoshop layer.
When is it used?
  • creating clusters and borders
  • creating stacked papers
  • creating quick pages
  • creating embellishments with multiple layers (like flowers with multiple layers or a button top of a flower)
  • general scrapbooking

What’s the FASTEST way to start?
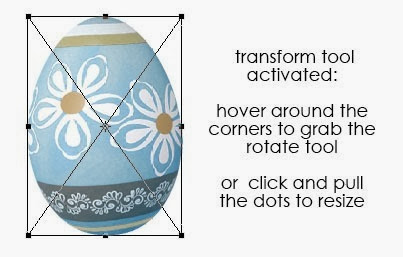
CTRL+T will bring activate the transform tool and enable you to start doing things like pulling on the handles/corners of the item to make it smaller or to rotate it.
Transform in Photoshop
{CU Egg from Easter Eggs by eqrAveziur}
What’s the hidden secret in the transform tool?
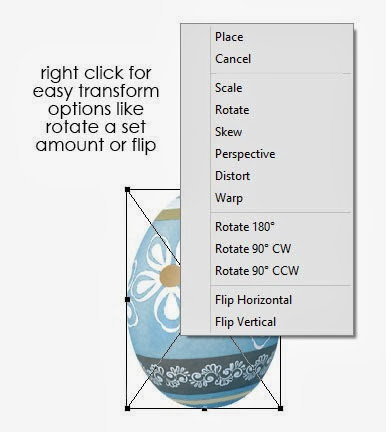
This is a gem, I think => when you right-click after activating the transform tool, you get a “hidden” menu of useful transformations right there! This is so useful for precise moves like exactly 90 degrees or exactly 180 degrees. Think how quick you can flip a border up to the top of a page like this! Or flip a paper over to the other side of a layout.
Give this a try and get familiar with ALL the items on this hidden menu and how they affect elements so you can get a better “handle” (get it?) on how to get things in just the right shape and orientation for your projects!
hidden transform menu in Photoshop

Did you find this useful? Subscribe to the CUDigitals weekly newsletter and never miss another tip, event or freebie! And be sure to follow us on Facebook for a CU freebie overlay set and daily links to helpful articles for your digital scrapbook design business.